Introduction: Why Build Your Own PC Gaming Computer?
Building your own gaming computer might sound intimidating, but it’s one of the most rewarding experiences for any gamer. Not only does this give you control over the specs, but it also allows you to tailor the machine to suit your gaming needs. In this guide, we’ll walk you through the process of building your own PC gaming computer, so you can create a high-performance system that fits your budget and style.
Benefits of Building Your Own PC Gaming Computer
- Cost-Effective: Pre-built gaming computers often come with a markup. By making your own, you can save money and get exactly what you need.
- Customization: Choose the components most important to you, such as a high-end GPU, more RAM, or superior cooling
- Upgradability: When you build your own PC, you make it future-proof. Upgrading parts down the line is easier and more cost effective.
Essential Components for Building a PC Gaming Computer
Before diving into the assembly process, it’s essential to know the key components of a gaming PC:
- Central Processing Unit (CPU)
The brain of your computer, the CPU handles all the processing tasks. For gaming, you’ll want a powerful processor like an Intel i7/i9 or AMD Ryzen 7/9. - Graphics Processing Unit (GPU)
The most important component for gaming, the GPU determines how well your computer will handle graphics-intensive games. Options like NVIDIA’s RTX 30 series or AMD’s Radeon RX 6000 series are excellent choices. - Motherboard
Your motherboard should support your chosen CPU and have the right slots for other components like RAM, GPU and storage. - Random Access Memory (RAM)
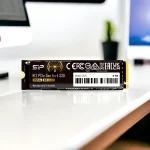
For gaming, 16GB of DDR4 RAM is the sweet spot, but 32GB can future-proof your build and improve performance for high-end games. - Storage (SSD/HDD)
A solid-state drive (SSD) is faster than a traditional hard drive (HDD), which leads to faster load times in games. Use at least a 500GB SSD and add a 1TB HDD for extra storage. - Power Supply Unit (PSU)
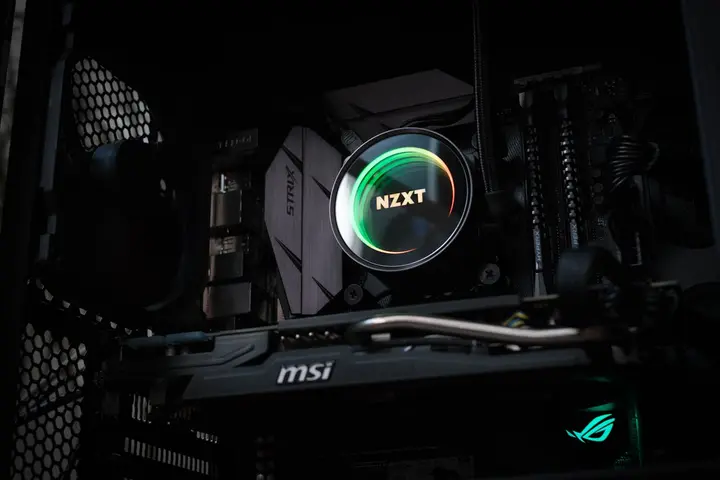
Make sure you have a PSU with enough wattage (usually 650W or higher) to support all your components. - Cooling System
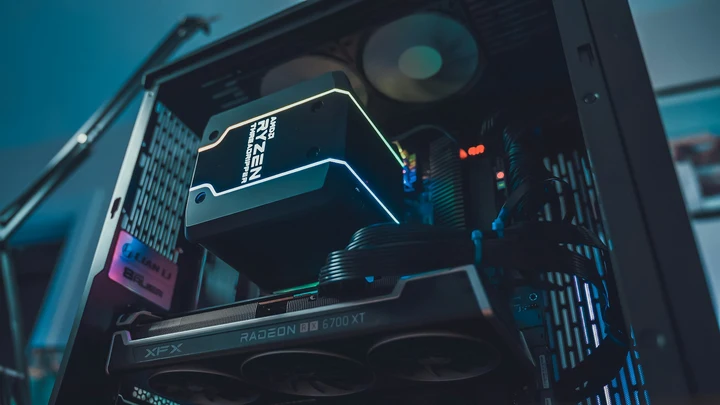
High-powered gaming PCs generate heat. Invest in a good air or liquid cooling system to maintain optimal temperatures. - Case
Choose a case that fits your components, has good airflow, and has enough room for future upgrades.
Safety Tips When Building Your Gaming PC
Building your own PC is generally safe, but following these safety precautions will ensure a smooth and accident-free process:
- Use an Anti-Static Wristband
Electrostatic discharge (ESD) can damage sensitive components like your motherboard, RAM or CPU. Wearing an anti-static wristband or grounding yourself by touching metal surfaces helps prevent ESD. - Work in a Clean, Dry Area
Avoid working in areas prone to dust or static. Keep liquids away from your work area to prevent accidental spills. - Turn Off the Power
Always make sure the power supply is turned off and unplugged before connecting or disconnecting. - Handle Components by the Edges
Avoid touching pins, contacts or circuits on sensitive components like CPU and GPU. Handle them by the edges to avoid damaging them. - Keep Your Workspace Organized
Loose screws or tools can accidentally scratch or damage components. Organize everything nicely before you start.
Tools You’ll Need to Build Your PC Gaming Computer
Before getting started, gather the following tools and supplies to ensure a smooth build:
- Screwdriver (Phillips Head #2)
A standard Phillips head screwdriver will be your main tool for screwing into components such as motherboards, GPUs and PSUs. - Anti-Static Wristband
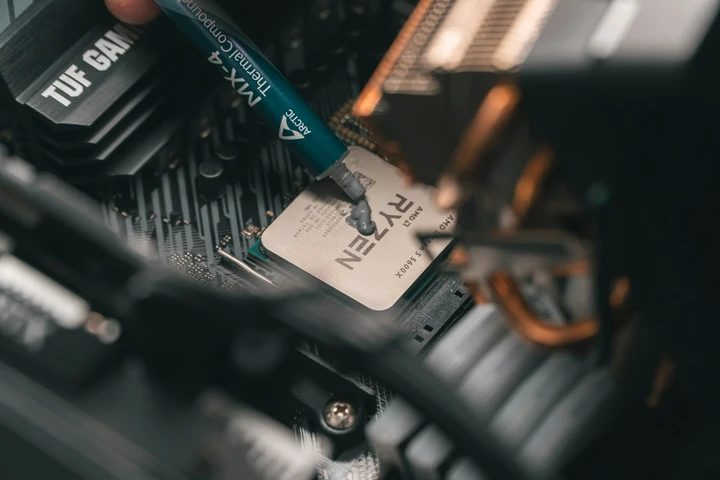
To protect your components from electrostatic discharge, wear an anti-static wristband during construction. - Thermal Paste
Some CPU coolers come with pre-applied thermal paste, but having a tube of thermal paste on hand ensures good thermal conductivity between the CPU and the cooler. - Zip Ties
Use zip ties to manage cables and keep your build tidy Good cable management improves airflow and keeps your case organized. - Tweezers or Small Pliers
This can help if you’re putting a screw in a tight spot or needing to handle small components like motherboard jumpers. - Flashlight
A small flashlight can help illuminate hard-to-see areas inside the case, making installation easier. - Compressed Air Canister
Use it to blow dust off your components, especially if you’re using an old case or component.
Step-by-Step Guide to Building Your Own PC Gaming Computer
Step 1: Gather All the Parts and Tools
Make sure you have all the necessary ingredients and equipment listed above. This will save time and prevent interruptions during construction.
Step 2: Install the CPU on the Motherboard
Carefully place and secure the CPU into the motherboard socket. Apply thermal paste to the CPU if necessary and attach a cooling fan or liquid cooler.
Step 3: Install the RAM
Slot the RAM into the designated slot on the motherboard. Make sure the RAM is properly seated with a firm click.
Step 4: Mount the Motherboard into the Case
Align the motherboard with the case standoff and secure it using the screws. Make sure you can access all the necessary ports for cables and other components.
Step 5: Install the GPU
Insert the GPU into the PCIe slot on the motherboard and secure it in place with screws.
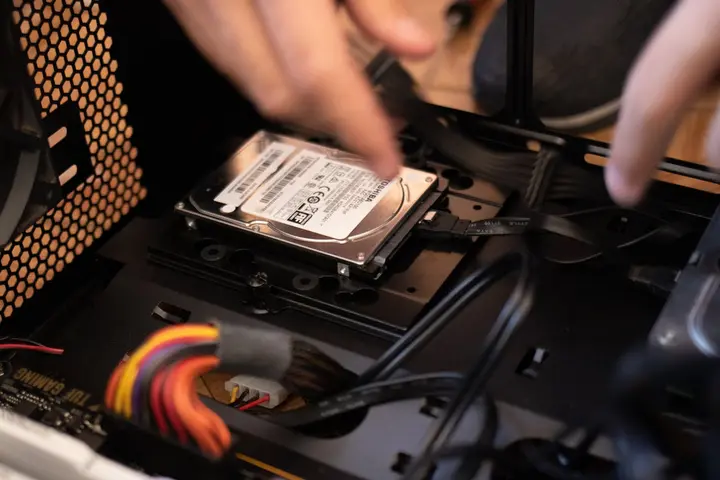
Step 6: Install Storage Drives
Place your SSD or HDD in the case drive bay and connect it to the motherboard using the appropriate SATA cables.
Step 7: Connect the Power Supply
Install the PSU in its designated area within the case. Connect the PSU cables to the motherboard, GPU and storage drive.
Step 8: Cable Management
Clean the cables to ensure proper airflow. Use zip ties to secure them and keep them out of the way of fans and other components.
Step 9: Install the Cooling System
If you are using an air cooler, make sure it is securely fastened to the CPU. If you are using liquid cooling, follow the manufacturer’s instructions for installation.
Step 10: Power On and Install an Operating System
Connect your PC to a monitor and keyboard and turn it on. Insert a bootable USB with your desired operating system (OS), such as Windows 10 or Linux, and follow the installation instructions.
Common Mistakes to Avoid When Building Your PC
- Incompatible Parts: Always double-check that your components are compatible with each other.
- Improper Cable Management: Bad cable management can restrict airflow and lead to overheating.
- Skipping the Thermal Paste: This small step is essential for proper heat dissipation between the CPU and cooler.
Conclusion: Building Your Dream Gaming PC
Building your own PC gaming computer may seem challenging at first, but it’s a fun and educational process that puts you in control of your gaming experience. By paying attention to the right materials, equipment, and safety, you’ll build a high-performance gaming rig that’s tailored to your needs. You’ll gain a deeper understanding of how computers work and the confidence to upgrade or troubleshoot your system in the future.
Whether you’re aiming for a budget-friendly build or a top-tier gaming powerhouse, building your own PC lets you get exactly what you want. Start your build today, and enjoy the satisfaction of knowing your gaming PC is uniquely yours!
FAQs About Building a Gaming PC
Q: How much does it cost to build a gaming PC?
A: Depending on the parts, building a gaming PC can range from $800 to $3000 or more.
Q: Is it hard to build a gaming PC?
A: It’s easier than you think! With the right guide and some patience, even beginners can build a PC.Q: Do I need liquid cooling?
A: For most gaming PCs, air cooling is sufficient. However, liquid cooling is ideal for high-performance rigs with overclocked components.